Account Setup Guide
Introduction
This document provides a step-by-step guide on how to set up a JijZept account with Jij Inc. The process involves contacting Jij Inc. for an account registration request, signing a usage agreement, and then obtaining a token through the portal site to start using the service. Please follow the instructions below to complete your JijZept account setup.
1. Contact Jij Inc.
To begin the registration process, please contact Jij Inc. by sending an email to [email protected]. In your email, please provide the following information:
- Your full name
- Company name
- Email address
- Brief description of your intended use of JijZept
Once we receive your email, we will review it and get back to you with further instructions.
2. Sign the Usage Agreement
After your account registration request has been approved, Jij Inc. will provide you with a usage agreement. Carefully review the terms and conditions, and sign the agreement.
3. Register on the JijZept Portal Site
Upon receiving your signed usage agreement, Jij Inc. will grant you access to the JijZept portal site. Follow the instructions provided in the email to register for an account on the portal site. You will be required to enter your email address and create a password.
4. Check project
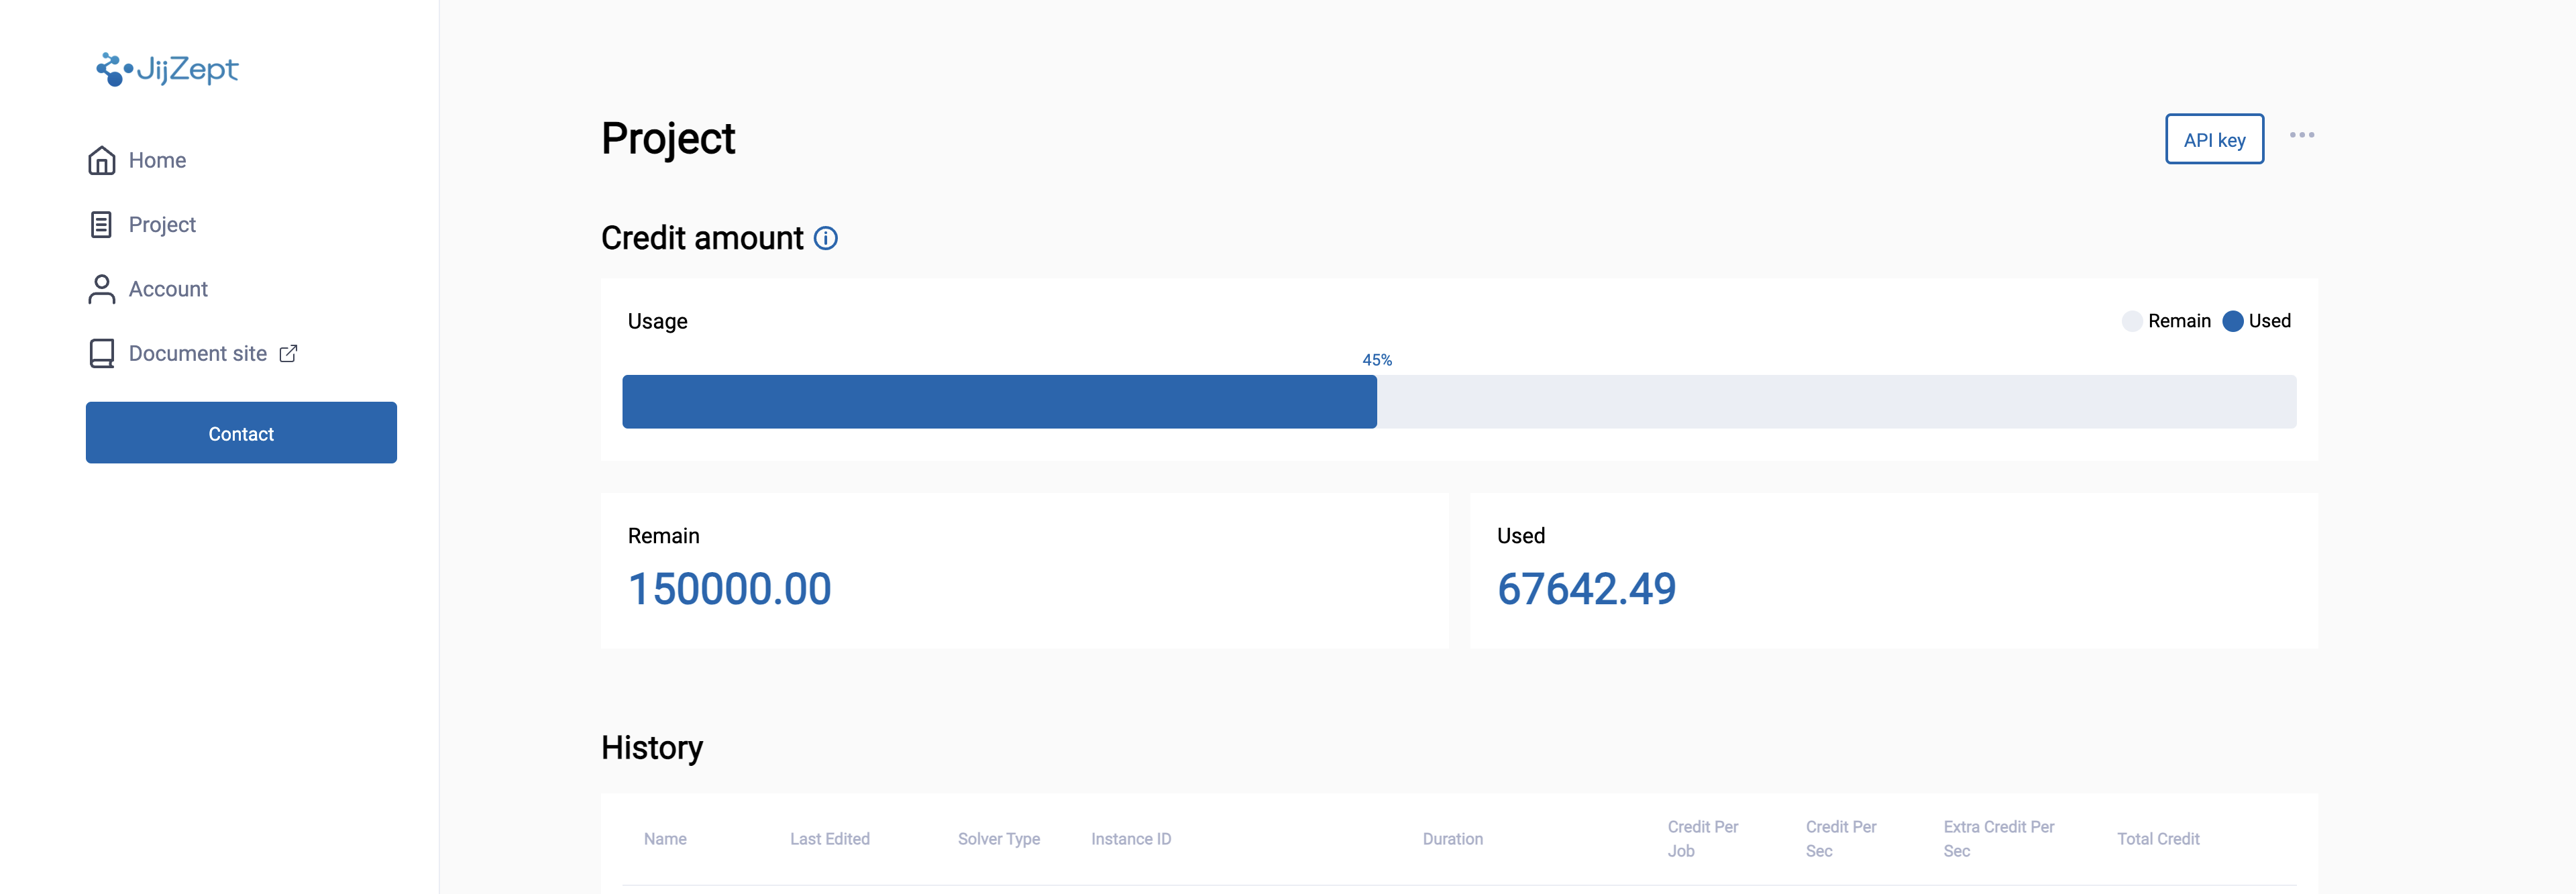
After the sign up, you can check a project at JijZept portal, which has been pre-created by the J-ij Inc.
The credit for using JijZept is granted on a per-project.
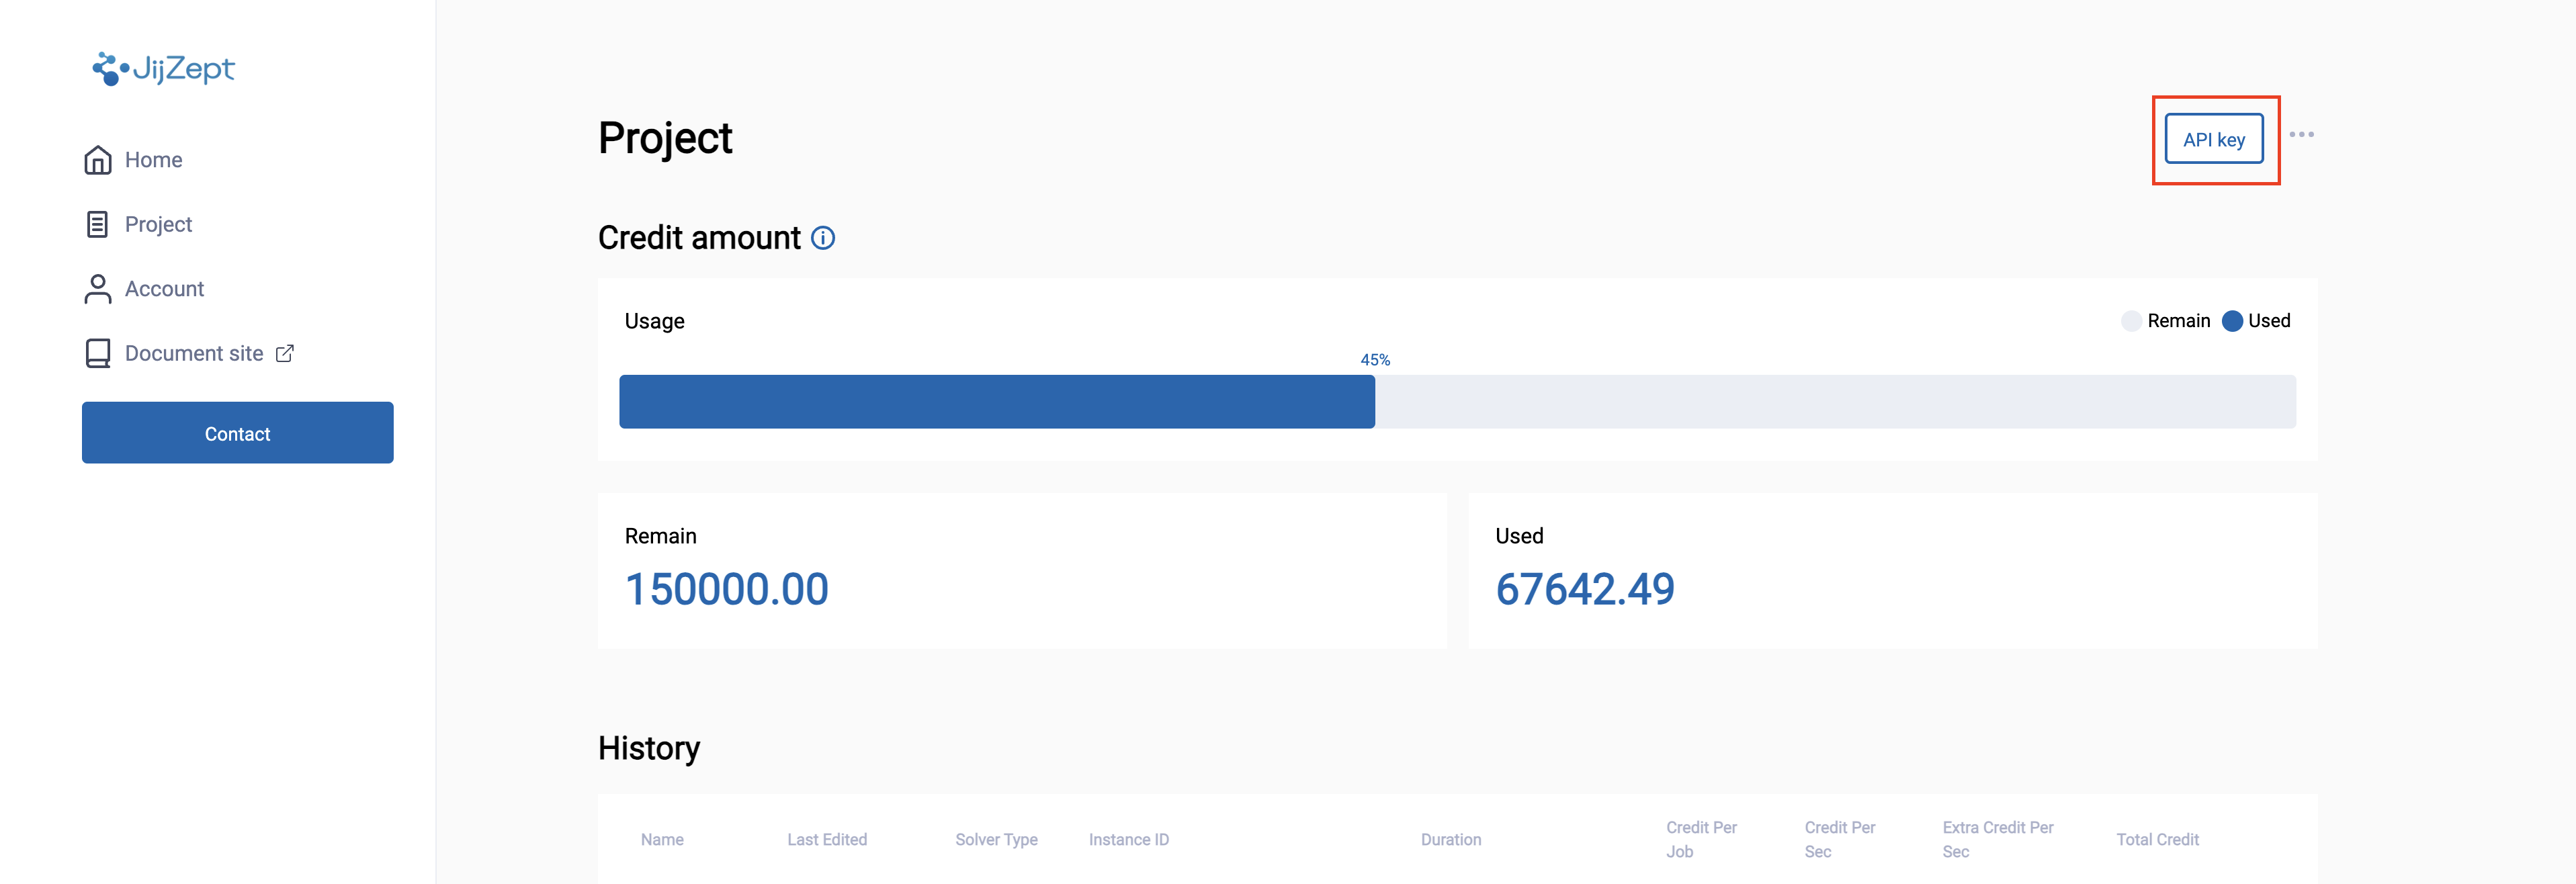
Go to the "Project Page" of the portal site. It is OK if "Project" is displayed as shown in the figure below.
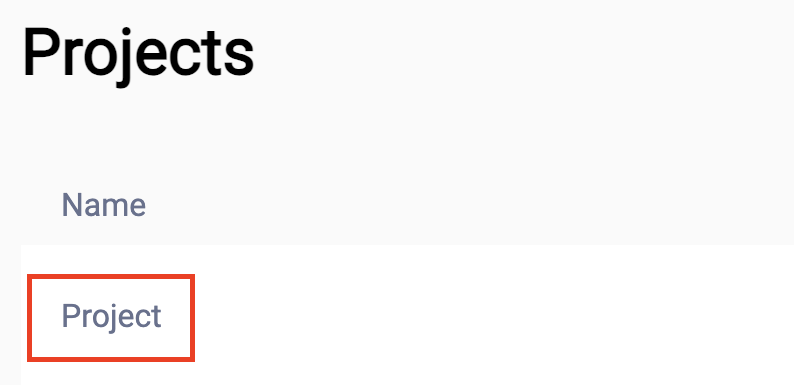
Go to the "Project Page" of the portal site. It is OK if "Project" is displayed as shown in the figure below.
If you do not have any Projects, please contact to Jij, or ask to be added as a Member to the Project of someone who has applied to use the service in the same organization.
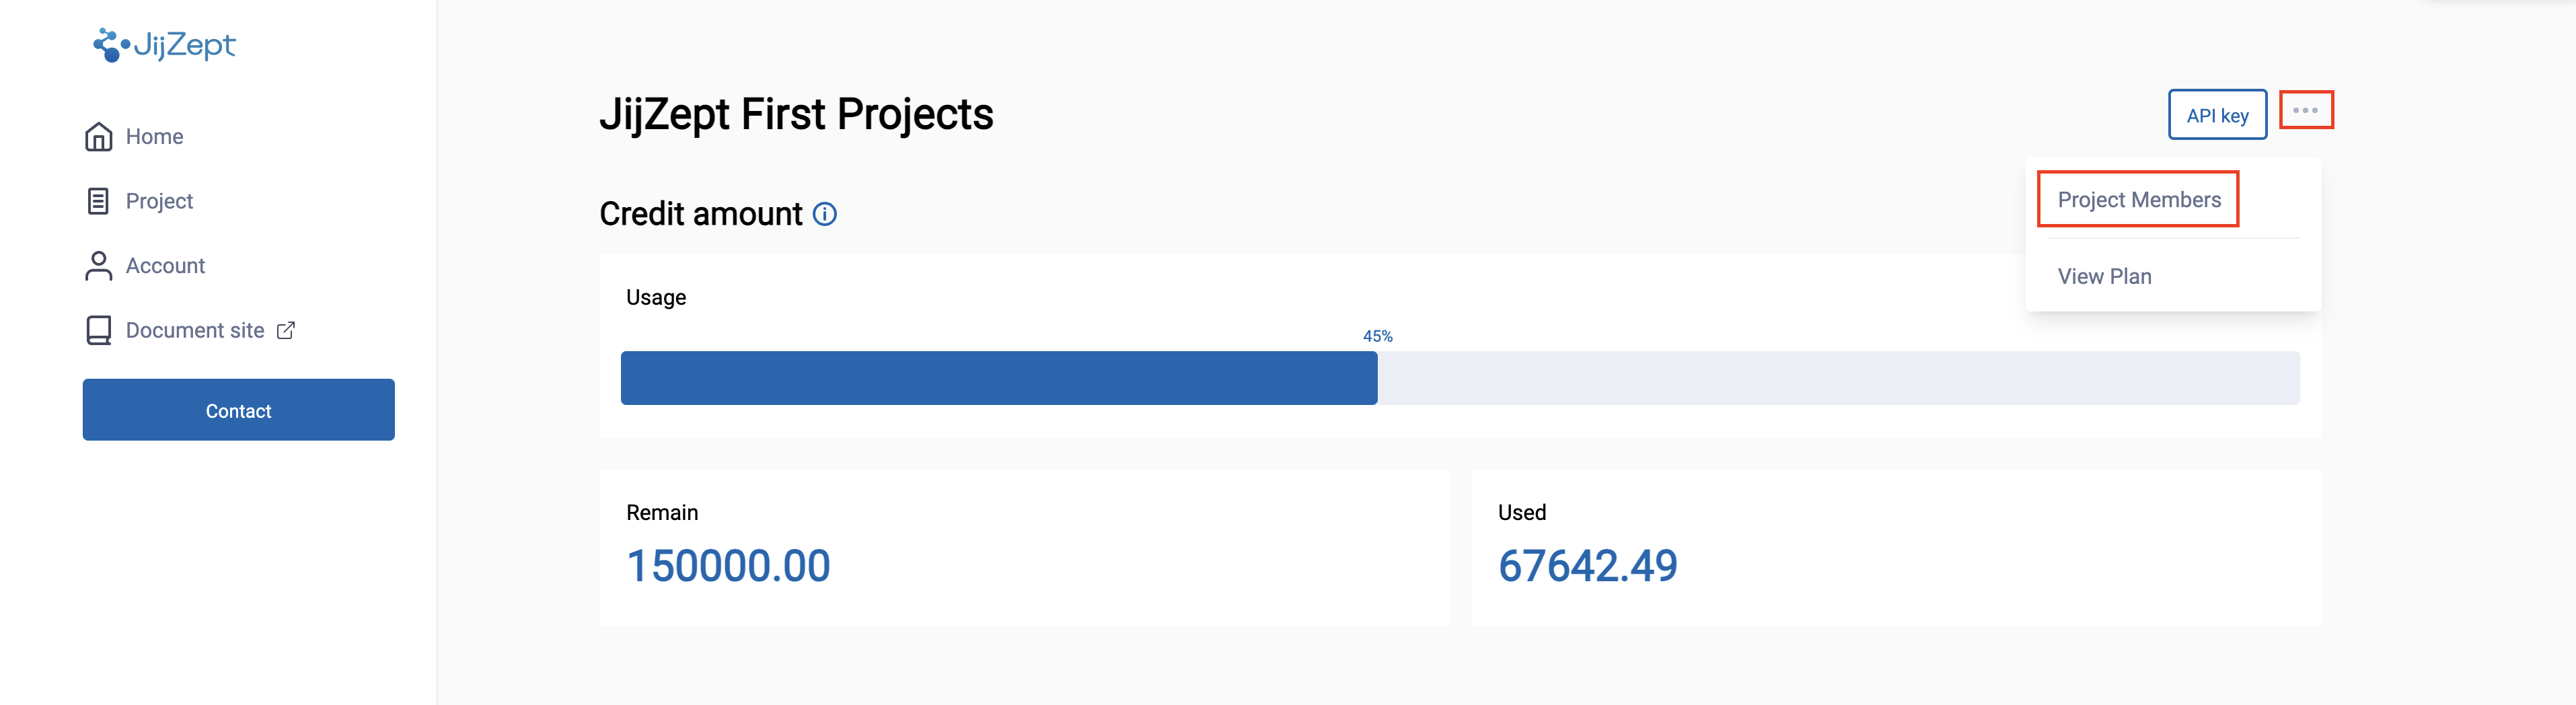
Add members to the project
The Admin user can add "Standard members" to the project. After having the person you wish to add as a "Standard member" create a JijZept account, please go to the Project page and add the user to the "Standard member" list using the email address from the account.
Adding a "Standard member" to a project allows you to share the credits granted to that project.
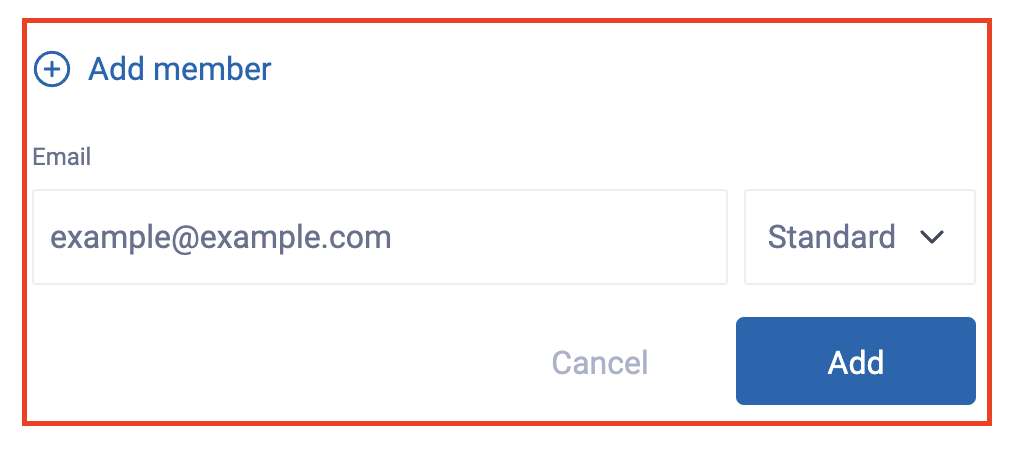
Click the Add member button, enter the email of the member you wish to add, select their permissions (typically standard), and then click the add button to register the member.
Once you have confirmed that your project has been credited, proceed as follows to obtain an API key.
If any of the project information is incorrect, please contact Jij.
5. API key
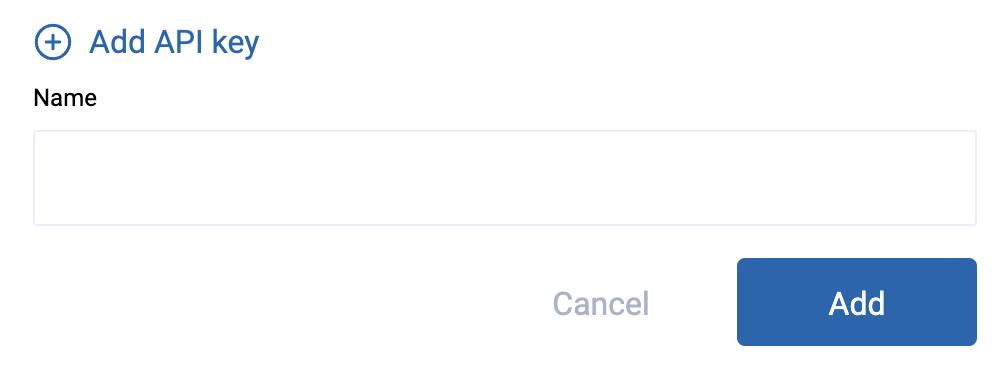
Click API key Button.
Next, click the Api key button, enter your Api key, and then click the add button to register your Api key.
Getting started
Install the Python SDK required to use JijZept from PyPI.
pip install jijmodeling jijzept
Now let's throw a request to JijZept. Create a working directory and navigate to it.
mkdir jijzept_sample; cd jijzept_sample
Create the following Python file named sample.py.
import jijmodeling as jm
import jijzept as jz

x = jm.BinaryVar('x')
y = jm.BinaryVar('y')
problem = jm.Problem('sample_problem')
problem += - x * y

sampler = jz.JijSASampler(token='**API key**', url="https://api.m.jijzept.com/")
response = sampler.sample_model(problem, {})
print(response.get_sampleset().data[0])
For the first argument of jz.JijSASampler, enter the "API key" you just created in the portal site's Dashboard.
When this script is executed, the Python SDK throws the problem to JijZept and displays the solution given by the solver, as shown below.
Sample(run_id="f5c5afca-edec-4345-8600-c41d2c008004", num_occurrences=1, run_info={}, var_values={"x": SparseVarValues(name="x", values={(): 1}, shape=(), var_type=VarType.CONTINUOUS), "y": SparseVarValues(name="y", values={(): 1}, shape=(), var_type=VarType.CONTINUOUS)}, eval=EvaluationResult(objective=-1, constraints={}, penalties={}))
You are now ready to get started with JijZept! Next, we will show you how to write the token and API URL settings in a configuration file separate from the source code.
If you have a pay-as-you-go subscription, you need to set url to "https://api.jijzept.com/".
You can see a log of issues sent to JijZept by setting the environment variable JIJZEPT_VERBOSE.
uploading instance ...
upload success instance_id=***instance_id***.
submitting query ...
submitted to the queue.
Your solution_id is ***solution_id***.
pending...
Sample(run_id="f5c5afca-edec-4345-8600-c41d2c008004", num_occurrences=1, run_info={}, var_values={"x": SparseVarValues(name="x", values={(): 1}, shape=(), var_type=VarType.CONTINUOUS), "y": SparseVarValues(name="y", values={(): 1}, shape=(), var_type=VarType.CONTINUOUS)}, eval=EvaluationResult(objective=-1, constraints={}, penalties={}))
If the request does not work because a proxy needs to be configured,
set the environment variables HTTP_PROXY and HTTPS_PROXY to the host and port of the proxy.
Creating JijZept configuration files
Now, create a configuration file for JijZept using the "API key" you obtained above.
Create a config.toml file with the extension .toml.
It is also recommended that you add config.toml to your .gitignore file and place it outside of git's control since this file will contain API keys, etc.
The config.toml file is written as follows
[default]
url = "https://api.m.jijzept.com/"
token = "0123456789abcdefg"
Set url to "https://api.m.jijzept.com/". Set token to the "API key" you obtained in portal site.
This completes the initial configuration. Next, let's try to use JijZept with the information described in this config.toml.
Specify the configuration file you described as the config argument instead of the token and url.
sampler = jz.JijSASampler(config='config.toml')
JijZept with JijModeling
In this section, we try constructing a simple constrained optimization problem using JijModeling. Then, we solve the model using JijZept.
Next we construct the above model by JijModeling.
JijModeling
import jijmodeling as jm

# one-dimension array
d = jm.Placeholder('d', ndim=1)
N = d.shape[0]
# one-dimension binary decision variable array with same shape of `d`.
x = jm.BinaryVar('x', shape=(N,))
# dummy index which is used in summation.
i = jm.Element('i', belong_to=(0, N))

problem = jm.Problem('test_problem')
cost = jm.sum(i, d[i]*x[i])
problem += cost
# constraint
problem += jm.Constraint('one-hot', jm.sum(i, x[i]) == 1)
Please see jijmodeling documentation for more information.
Solving problems with jijzept
from jijzept import JijSASampler

# instance data for `Placeholder` `d`
data_d = [1.0, 0.1, 2, 1]

sampler = JijSASampler(config='config.toml')
response = sampler.sample_model(
    problem,
    feed_dict={'d': data_d},
    multipliers={'one-hot': 1.0},
    search=True,
    num_search=10
)
Here are the arguments for .sample_model.
feed_dict: a dictionary of concrete values to be set to variables constructed withPlaceholder. Corresponds to the instance in question.multipliers: Sets the value of the multiplier to be used for penalty terms and so on. Placeholders not set infeed_dictwill be recognized as undetermined multipliers. TheConstraintclass is automatically multiplied by thePlaceholderclass variable by default, so set the value here.search: IfTrue, search for feasible solutions by adjusting the value set inmultipliersas the constraint strength. At mostnum_readsxnum_searchtimes annealing will be performed.num_search: You can set the maximum number of parameter updates whensearchis set toTrue. However, if a feasible solution is obtained during the update, the number of updates will be less than or equal to the number of updates set innum_search, because the update will stop.